
Manage users
 The user training video Subject Outlines Admin shows you how to add new subject coordinators, amend subject access, run reports and send emails to users via Subject Outlines.
Note: Only users with CI/SO administrative privileges can amend users in CI or Subject Outlines.
Roles are set up in the Curriculum Information System (CIS) by the System Admin. Users are assigned to a role.
Roles
The names of the roles indicate what each one can do. The following conventions are used:
- 'Admin' in the role name means there is a level of administration attached to the role, i.e. the role can manage users and create reports in the system it has access to:
- 'Admin' is the role assigned to the system administrators only
- 'Admin Editor' means the role has administrative and editing access to a system
- 'Editor' means the role has editing access and can make changes to data
- 'Reviewer' means the role has reviewer access and can see data but not change it
- 'CI' means the role has access to the Course Information (CI) tab
- 'SO' means the role has access to the Subject Outlines (SO) tab
- 'S' means the role is restricted to accessing subject information only
- '-FacAssessmentTaskFields' means the role has no access to the assessment task fields that require faculty approval
- 'WF' means that the role has some level of access to workflow in SO: the letter(s) after WF indicate what this is:
- 'C' means the role can create a change request
- 'R' means the role can respond to a change request, access it and either recommend, reject or note it and then transfer it to an approver
- 'A' means the role can approve change requests
- '-email' means the role does not receive the emails generated at the various stages of workflow, unless the role is assigned to the change request
- 'GA' means that the role can edit graduate attribute data and create and run reports
Manage users
To manage users, e.g. change a user's role or to add or delete a user, go to Admin / Users. You're taken to the List tab where all users you have access to amend are listed.
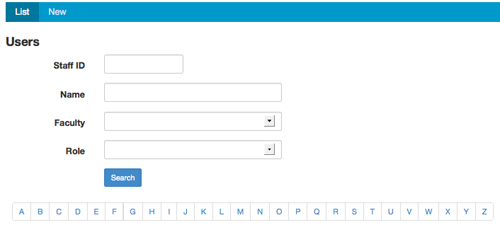
Search for a user
New user
Amend user
What role?
Email users
Search for a user
On the List tab, search for the user using the staff id, name, or role (the faculty displayed will be the faculty you're assigned to as you can only search for users in your own faculty). Alternatively you can browse for the user by scrolling through the list of users (alphabetically ordered by first name) or you can use the alphabetic links at the top of the list to go directly to a specific letter.
New user
To create a new user, click the New tab.
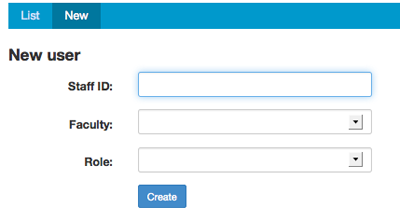
Add the staff id and choose the role and faculty from the drop-downs. Then click the [Create] button.
Once you have created the new user in CIS, lodge a ServiceConnect request with TsOps to add the new user to the CIS AD user group.
Suggested text for the request:
- Brief description:
Add new user to CIS AD user group. Please forward onto TsOps
- Additional details:
Please add the following users to the CIS AD user group (adsroot.uts.edu.au/Public/Groups/CIS Subject Outline Users)
User: name.surname@uts.edu.au
Staff ID: xxxxxx
Amend user
To amend the access of an existing user, you search for the user and, once found, click the 'Edit' link. You're taken to the Edit tab where you can change the role or the faculty.
What role?
Note: Admin Editors can assign only certain roles to users based on their own level of access (i.e. 'Admin Editor (CI)' can only assign roles in CI; 'Admin Editor (SO)' can only assign roles in Subject Outlines; 'Admin Editor (CI + SO)' can assign roles in CI and SO). Importantly, Admin Editors cannot create other Admin Editors in either component of the system. The System Admin in APO CIS assigns Admin Editor roles.
Admin Editors can assign the following.
If the user needs access to the Course Information (CI) tab only
- Edit: the user needs to be able to edit data in CI, and view the Graduate Attributes tab and run existing reports: set as 'Editor (CI)'
- View: the user needs to be able to see data in CI but not edit anything, and view the Graduate Attributes tab and run existing reports: set as 'Reviewer (CI)'
If the user needs access to Subject Outlines (SO) only
- Subject coordinator: the user needs to be able to edit the subject coordinator fields, assessment tasks (excluding the faculty approved fields) and the week-by-week program, as well as generate a subject outline PDF; set as:
- 'Editor (SO): WF: C' (if they need access to workflow), or
- 'Editor (SO)' (if they don't need access to workflow)
If the user needs access to CI and SO: no workflow
- Edit: the user needs to be able to edit data in CI; view data on the Graduate Attributes tab and run existing reports in CI; and edit the subject coordinator fields, assessment tasks (excluding the faculty approved fields) and the week-by-week program, as well as generate a subject outline PDF in SO: set as 'Editor (CI + SO)'
- Edit + GA: the user needs to be able to edit data in CI; edit data on the Graduate Attributes tab and create new and run existing reports in CI; and edit the subject coordinator fields, assessment tasks (excluding the faculty approved fields) and the week-by-week program, as well as generate a subject outline PDF in SO: set as 'Editor (CI + SO): GA'
- Edit GA only: the user needs to be able to see data in CI and SO but not edit anything; but edit data on the Graduate Attributes tab and run existing reports in CI: set as 'Reviewer (CI + SO): GA'
- View: the user needs to be able to see data in CI and SO but not edit anything; view data on the Graduate Attributes tab and run existing reports in CI: set as 'Reviewer (CI + SO)'
- View (subjects only): the user needs to be able to see subject data in CI and SO but not edit anything; view data on the Graduate Attributes tab and run existing reports in CI: set as 'Reviewer (CI + SO): S'
- View (CI) and Edit (SO): the user needs to be able to see data in CI but not edit anything, view data on the Graduate Attributes tab and run existing reports in CI, edit the subject coordinator fields, assessment tasks (excluding the faculty approved fields) and the week-by-week program, as well as generate a subject outline PDF in SO; the user needs no access to workflow: set as 'Reviewer (CI) Editor (SO)'
If the user needs access to CI and SO: with workflow
- View (CI) and Edit (SO): the user needs to be able to see data in CI but not edit anything, view data on the Graduate Attributes tab and run existing reports in CI, edit the subject coordinator fields, assessment tasks (excluding the faculty approved fields) and the week-by-week program, as well as generate a subject outline PDF in SO; in addition the user needs to create workflow change requests: set as 'Reviewer (CI) Editor (SO): WF: C'
Email users (by role/faculty)
Emails can be sent to a group of users with the same role and/or within the same faculty.
Go to Admin / Emails. You're taken to an email set-up screen where you can choose the roles and/or the faculties to send the email to. Type the subject line and the body of the email and then click the [Next] button.
The next screen shows you the email and the actual users it will be sent to. If this is correct, click the [Send] button, otherwise click the [Back] button to make amendments before sending.