Workflow (Change Request)
The workflow process enables a subject coordinator (the 'creator') to request a change ('create a change request') to a subject field that he or she doesn't have edit access to. This change request is checked by an authorised person in the faculty (the 'responder', e.g. the faulty admin person who makes CIS changes) who recommends the change for approval or rejection and then forwards ('transfers') it to the final authority in the faculty (the 'approver', e.g. the associate dean) for final approval or rejection.
The change request moves through several workflow states, displayed at the top of the subject's workflow screen:
- Idle
- Request in preparation
- Request submitted
- Fields being assessed
- Pre-approval complete
- Ready for approval
- Closed
Create change request: workflow 'creator' (e.g. the subject coordinator)
 The user training video Subject Outlines: Change Request shows you how to create a Workflow change request via the Change Request tab.
If a subject coordinator wants to change some data in, for example, the 'Learning outcomes/objectives' field (this isn't a field available to edit by subject coordinators in Subject Outlines), they need to create a change request in the workflow system within Subject Outlines. The change is responded to and approved/rejected within the system and any changes, once approved, are available for use in publications (e.g. the subject outline PDF).
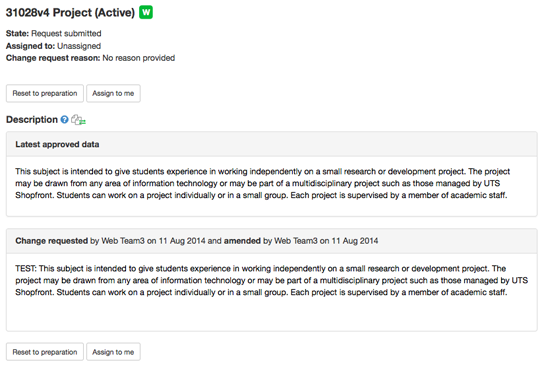
Note: some fields require APO: CIS approval after they have been through the workflow process (e.g. the 'Description' field). Until this approval has occured, the data is not available for use in publications (approval usually takes less than 24 hours). Subjects with fields requiring APO: CIS approval are indicated by a blue edit icon beside the subject name.
![]()
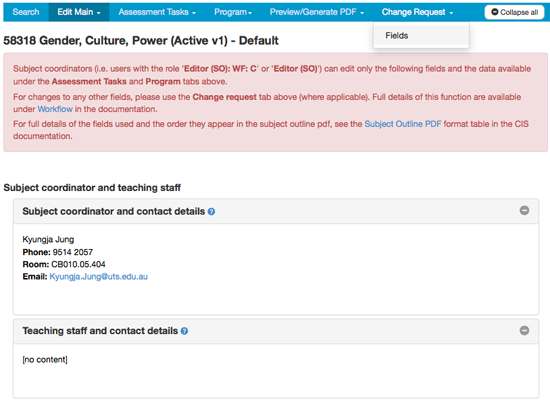
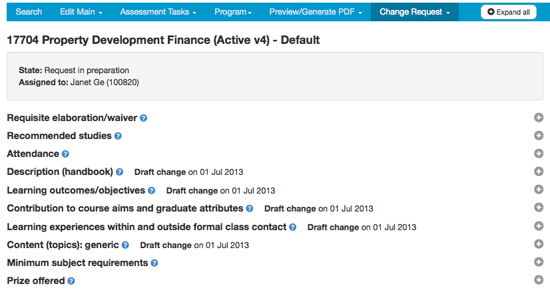
To create a change request, log in to Subject Outlines. Search for the subject and once found, click the 'Default' instance of the subject (the Change Request tab is only available via the Default instance).
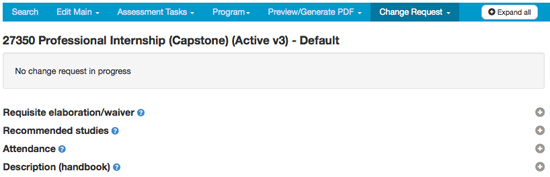
Go to the Change Request tab, choose 'Fields'. The fields not editable by the subject coordinator are displayed.
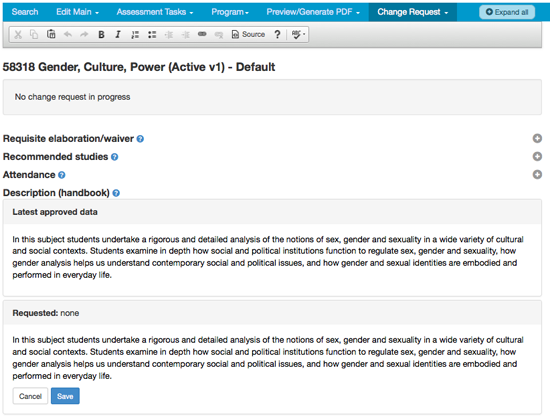
Click the field name you want to edit; the latest approved data is displayed. Under 'Requested', click on '[click to add a change request]'.
This opens a text editor where the latest approved data is displayed. Add your amendments to this data and click the [Save] button.
Workflow is in the Request in preparation state.
The change is saved as a 'draft change'.
You can make amendments to any additional fields, either now or at a later date. Once you make your first amendment, the subject is locked so no-one else can create an additional change request.
Once you've made amendments to all relevant fields, but before you submit them for approval, you can create a draft subject outline PDF incorporating all the changes you are proposing. This will help you check that the proposed changes do not introduce inconsistencies into the subject outline.
Go to the Change Request tab, choose 'Preview PDF'.
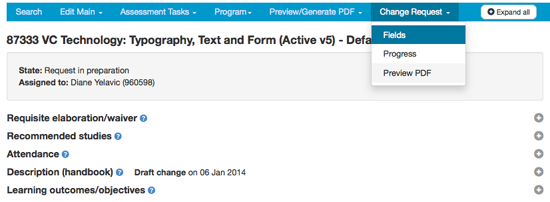
Choose the PDF options and click the [Preview PDF] button. The draft PDF is generated with a 'Draft' watermark on every page.
If the draft PDF is satisfactory, return to the Change Request tab and choose 'Fields'. Click the [Submit] button at the bottom of the screen to submit the change request package. (Note: you can cancel the change request before submitting it by clicking the [Cancel] button. This will remove all draft changes and return the subject to the idle state.)
Deleting data
Standard fields
To request to delete all data in a standard field, highlight the data and click the [Delete] button on your keyboard or the 'cut' button (i.e. the scissors) on the text editor toolbar. Click [Save].
Learning objectives
To request to delete a learning objective, simply delete the data from each field in the relevant row. Click [Save].
You do not need to move any data into the empty row. Empty rows will be removed when you click the [Save] button.
Note: The SLO numbering may need to be fixed and you may need to relink SLOs in the some/all CLTs.
Manage tasks
To request to delete an assessment task, simply delete the data from each field in the relevant row. You need to amend the weight values so the total still adds up to 100. Click [Save].
Before you can submit the change request package, you then need to go to Assessment Tasks tab / Manage tasks, and amend the display checkboxes so they are only ticked on for the non-deleted tasks, and total 100.
Note: Assessment task numbers will be renumbered automatically when the PDF is generated.
Criteria linkages
To request to delete an SLO or CILO option from the Criteria linkages table (CLT), click on the dropdown and choose the 'blank' option at the top of the dropdown list. Rows in the middle of the CLT cannot be empty, so data needs to be moved up to remove the empty row(s).
Validation
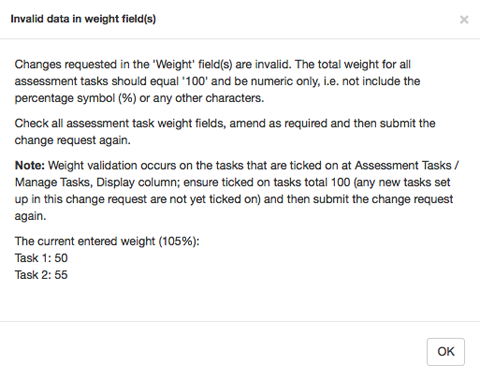
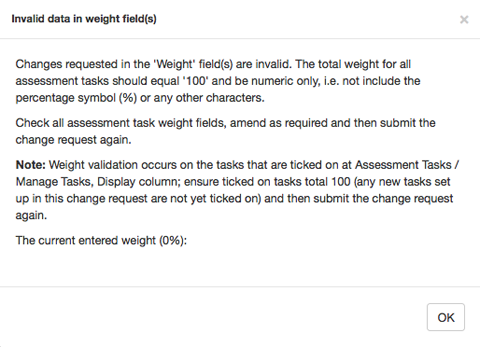
If the change request includes changes to any of the assessment task 'Weight' fields, the new data will be validated before the change request submission can be completed. Weight validation occurs only on the tasks that are ticked on at Assessment Tasks / Manage Tasks, Display column, so the total weight for all ticked on assessment tasks should equal '100' and be numeric only, i.e. not include the percentage symbol (%) or any other characters
If data has been added via change request to one or more weight fields that causes the total to not equal 100, then the submission process will be cancelled and a pop-up screen will advise you that there's a problem. Check all assessment task weight fields, amend as required and then submit the change request again.
Any new task set up in the change request is, by default, not yet ticked on and its weight will therefore not be included in the validation calculation. The submission process will be cancelled and a pop-up screen will advise you that there's a problem. If you have a new task in your change request, go to Assessment Tasks / Manage Tasks and tick the checkbox beside the relevant new tasks in the 'Display' column; return to the Change Request / Fields and then submit the change request again.
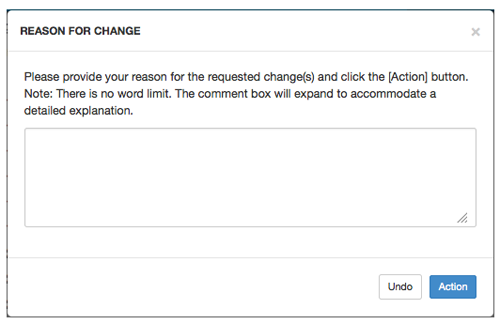
Once you click the [Submit] button and the data validates, you then have the opportunity to add a comment about the submitted change request package. Any information added to the comment is included on Log tab and the alert email sent to the workflow 'responder'.
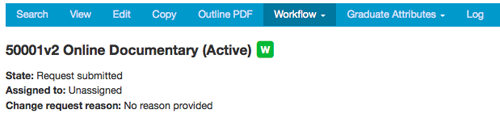
Workflow is in the Request submitted state.
Note: You must click the [Submit] button to move the change request into the next workflow stage (i.e. to notify the 'responder' that there is a change awaiting approval). If you try to leave the screen without clicking the [Submit] button, you'll get a pop-up warning.
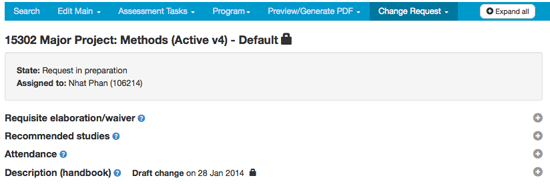
In the Change Request tab, there is now a message displayed against the changed field stating when the change was requested and includes a lock icon indicating that the field is locked to further edits until the requested changes are approved.

The subject name also displays a lock indicating that it is locked to any further edits until the requested changes are approved.
2. Respond to the change request: workflow 'responder'
WF Basic Procedures Guide (PDF 556kB) (updated 3 August 2017).
The user training video Workflow demonstrates the workflow process in CIS once a change request has been submitted in Subject Outlines.
Once a workflow change request 'creator' clicks the [Submit] button, users in the faculty with workflow 'responder' privileges receive an email alerting them to the change request.
In CI / Notifications / Workflow, the list of subjects with change requests waiting for a response (i.e. in the 'Request submitted' state and waiting to be assigned to a 'responder') or in progress is displayed.
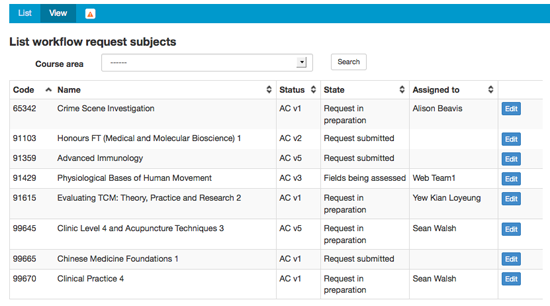
To assess a new change request, click the [Edit] button beside the subject you want to assess. You're taken to the Workflow tab of the subject where you can see the fields that have changes.
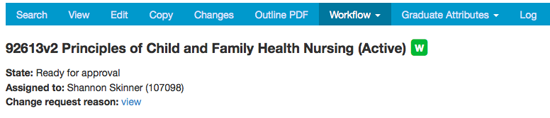
Note the green 'W' at the top of the subject, indicating that it has a workflow change request in progress.
Reason for change
If the subject coordinator provided a reason for the change there will be a 'View' link beside 'Change request reason'.
If no reason was provided by the subject coordinator, there will be no 'View' link
Reset to preparation state
Responders can return a change request to the creator (i.e. subject coordinator) after it has been submitted by clicking the [Reset to preparation] button found at the bottom of the change request in the Workflow tab. The responder can include comments to the creator specifying where additional amendments are needed and/or the reason for resetting the change request, at the point of clicking the button.
Clicking this button sends an email (including any comments made by the responder) to the creator advising him/her that the subject has been reset to the 'Request in preparation' state. As such, all fields are unlocked enabling the creator to make further changes. Any changes made by the responder during the 'Fields being assessed' state (before the [Reset to preparation] button was clicked) are retained when the changes request is reset and returned to the creator (the creator can obviously overwrite any responder changes before re-submitting the change request).
Assign to me
The workflow state must be 'Fields being assessed' and the change request must be assigned to you BEFORE you are able to see the approve, reject or note buttons in each field. The state changes to 'Fields being assessed' once the change request is assigned to someone.
Assign the change to yourself by either clicking the [Assign to me] button, or making and saving a change in any field (note: a red flag alert icons will then appear beside every field that requires your assessment).

Once a 'responder' is assigned to a change request, it is reflected in the list of change requests at CI / Notifications / Workflow (in the 'Assigned to' column) and in the list provided when clicking on the orange alert notification icon.
When the change request is in the Fields being assessed state, the responder can access the fields and/or 'transfer' the change request to another 'responder' before the assessment is complete. Only the names of 'responders' are on the drop-down list in the 'Fields being assessed' state.
Once in the 'Fields being assessed' state, red flag alert icons (i.e. ![]() ) appear beside every field that requires assessment by a 'responder'. These icons disappear once the field is assessed as 'Recommend for approval' or 'Recommend for rejection'. Note: The red flag changes to a red pin (i.e.
) appear beside every field that requires assessment by a 'responder'. These icons disappear once the field is assessed as 'Recommend for approval' or 'Recommend for rejection'. Note: The red flag changes to a red pin (i.e. ![]() ) if the field is assessed by the 'responder' as 'Noted'. The red pin is an alert for an additional 'responder' or the final 'approver'.
) if the field is assessed by the 'responder' as 'Noted'. The red pin is an alert for an additional 'responder' or the final 'approver'.
Compare differences
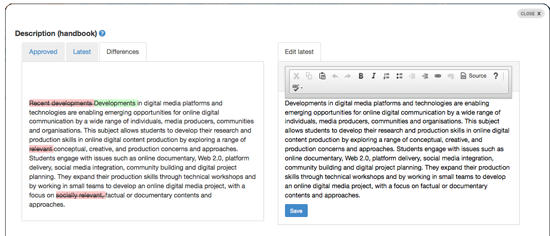
To see specifically what changes have been made to the data, click the compare differences icon located beside the field name (i.e. ![]() ). This opens a pop-up window where on the left you are shown the differences in the data (the green highlight means added data; the red highlight with strike-through means deleted data) and on the right there is a text editor with the latest changed data displayed. You can edit the data here in the text editor as required and then click the [Save] button. Click the [Close x] button to return to the Workflow tab
). This opens a pop-up window where on the left you are shown the differences in the data (the green highlight means added data; the red highlight with strike-through means deleted data) and on the right there is a text editor with the latest changed data displayed. You can edit the data here in the text editor as required and then click the [Save] button. Click the [Close x] button to return to the Workflow tab
Assess requested change
Note: The workflow state must be 'Fields being assessed' and the change request must be assigned to you BEFORE you are able to see the approve, reject or note buttons in each field. If this isn't the case, click the [Assign to me] button.
The 'responder' must assess each field in the change request package.
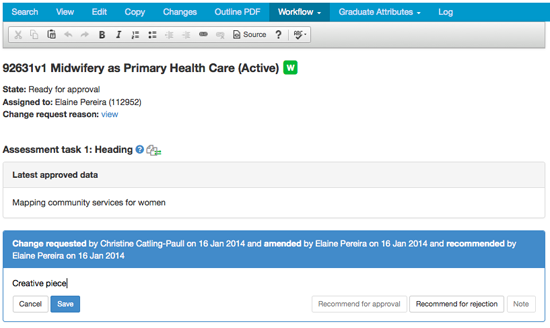
Go to the first field and click on the 'Change requested' data to open the text box.
To approve, reject or note a change, you must click one of the three assessment buttons at the bottom of the text box:
- [Recommend for approval]: the change is ok, has been checked for grammar and typos and is recommended for approval (the red flag will disappear)
- [Recommend for rejection]: the change is not ok and is recommended for rejection (the red flag will disappear)
- [Note]: the 'responder' can't decide if the change is ok or not; it's been checked for grammar and typos and noted and is transferred to another 'responder' or the 'approver' to make the decision (the red flag will change to a red pin).
Once all fields are assessed (i.e. they have been recommended, rejected or noted and consequently there are no red flags displayed, but there may be red pins), the 'responder' can move the change request into the next workflow state.
Additionally, the responder can generate a draft subject outline PDF incorporating all the changes being proposed, via the 'Workflow' tab, 'PDF' option.
- If all fields are either recommended, rejected or noted (i.e. no red flags but one or more red pins are displayed) (and therefore workflow is in the Pre-approval complete state):
- transfer the change request to another 'responder' for further assessment of the fields with the red pin alerts (note: the names of 'responders' and 'approvers' are on the 'Transfer to' drop-down list), or
- transfer the change request to the 'approver' for assessment of the fields with the red pin alerts and final approval (the names of 'responders' and 'approvers' are on the 'Transfer to' drop-down list), or
- If all fields are either recommended or rejected (i.e. no red flags or red pins are displayed) (and therefore the workflow is in the Ready for approval state): transfer the change request to the 'approver' for final approval (only the names of 'approvers' are on the 'Transfer to' drop-down list).
Go to the Workflow tab, choose 'Transfer'.
![]()
From the drop-down list at 'Transfer to', choose the workflow 'approver' (or 'responder' if required, see above) to transfer the change request to, add comments if needed/helpful, and click the [Transfer] button.
![]()
An email is sent to the 'approver' or the 'responder', i.e. the user who the change request was transferred to, and you are returned to the Notifications list where you can choose another workflow change request to process.
3. Approve the change request: workflow 'approver'
WF Basic Procedures Guide (PDF 556kB) (updated 3 August 2017).
The user training video Workflow demonstrates the workflow process in CIS once a change request has been submitted in Subject Outlines.
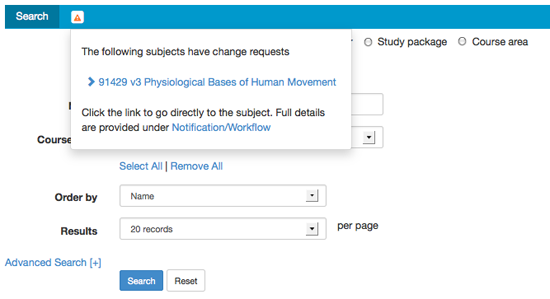
Once transferred, the 'approver' receives an email saying that there is a change request waiting for his or her final approval. In addition, there is also an alert notification icon beside the Search tab when he or she logs into the system. The 'approver' can click the alert notification icon and then the subject or it is also accessible via the 'Edit' link at CI / Notifications / Workflow.
The workflow state (visible at CI / Notifications / Workflow, 'State' column or at the top of the workflow processing screen) will be either:
- Ready for approval: this means that the change request has been fully assessed by one or more responders and they have recommended or rejected all fields; check each field to ensure you agree with the responder's assessment and override any you don't agree with by clicking the relevant button
- Pre-approval complete: this means that the change request has been fully assessed by one or more responders and they have recommended, rejected or noted all fields. Noted fields are fields that the 'responder' can't make a decision on, i.e. they can't decide whether to recommend or reject them. Therefore, in addition to checking the recommended and rejected fields, the 'approver' also needs to assess the noted fields and decide themselves whether to recommend or reject them. Noted fields are indicated on screen with a red pin icon (i.e.
 )
)
Go to the subject.
Reason for change
If the subject coordinator provided a reason for the change there will be a 'View' link beside 'Change request reason'.
If no reason was provided by the subject coordinator, there will be no 'View' link
Compare differences
To see specifically what changes have been made to the data, click the compare differences icon located beside the field name (i.e. ![]() ). This opens a pop-up window where on the left you are shown the differences in the data (the green highlight means added data; the red highlight with strike-through means deleted data) and on the right there is a text editor with the latest changed data displayed. You can edit the data here in the text editor as required and then click the [Save] button. Click the [Close x] button to return to the Workflow tab
). This opens a pop-up window where on the left you are shown the differences in the data (the green highlight means added data; the red highlight with strike-through means deleted data) and on the right there is a text editor with the latest changed data displayed. You can edit the data here in the text editor as required and then click the [Save] button. Click the [Close x] button to return to the Workflow tab
Assess change request package
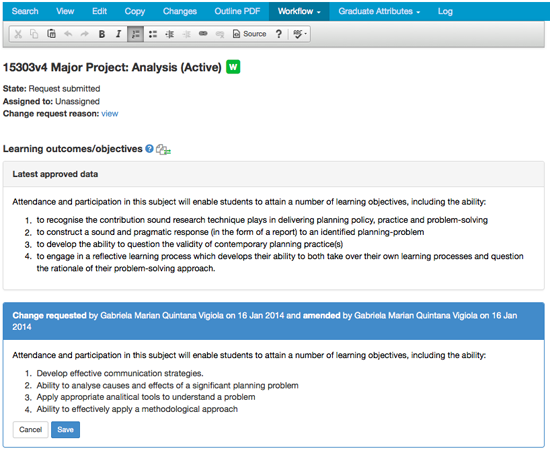
On the Workflow tab, the 'Latest approved data' and the 'Change requested' data is displayed for each field that has a change request.
The approver must: (1) assess each field individually in the change request package; and then (2) action/reject the package as a whole.
Additionally, the approver can generate a draft subject outline PDF incorporating all the changes being proposed, via the 'Workflow' tab, 'PDF' option.
1. Assess each field individually
The approver must work through each field in the change request package, each time doing one of the following:
- agree with the responder's assessment (no action on the field is needed)
- amend the field (click on the 'Change requested' data and the text box opens; amend the data and click the [Save] button)
- override the responder's assessment of the field (click on the 'Change requested' data and the text box opens; click either the [Recommend for approval] or [Recommend for rejection] button (only one will be active)
- make their own assessment on any noted field (noted fields have a red pin icon beside them, i.e. ) (click on the 'Change requested' data and the text box opens; click either the [Recommend for approval] or [Recommend for rejection] button (both will be active).
2. Assess the change request package as a whole
Once all fields in the change request have been fully assessed (i.e. all fields are recommended or rejected and there are no red pin icons displayed), the approver needs to then click the relevant button at the bottom of the screen to action or reject the whole change request package. Note: these buttons only appear when all fields have been fully assessed; they will not be displayed if there are fields that still have a preliminary assessment of 'Noted', i.e. there is a red pin icon displayed beside the field name.

There is NO UNDO function once either button has been clicked. You can, however, refer to the log to view any past activity.
The buttons are:
- [Action change request package]: click this button if you think the assessment of every field (i.e. either 'recommended' or 'rejected') in the change request package is correct. When this button is clicked, changes that have been 'rejected' will disappear from the system; changes that have been 'recommended' will be held in the system.
- [Reject change request package]: click this button if you think the assessment of every field (i.e. either 'recommended' or 'rejected') in the change request package is not correct. When this button is clicked, changes that have been 'rejected' AND changes that have been 'recommended' will be permanently lost from the system.
After clicking either button, the 'approver' can also add a final comment about the submitted change request.
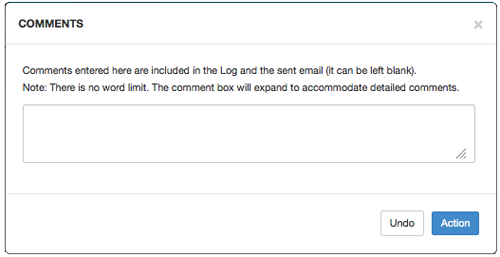
Any information added to the comment is included on the Log tab and the alert email forwarded to the workflow 'creator' and the workflow 'responder'.
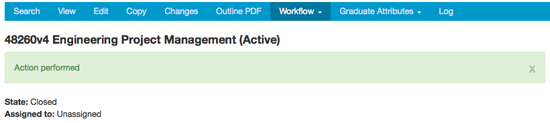
The workflow request is then in a 'closed' state.