
- Access
- Fields
- Procedures
- Handbook Schedule
- Resources
- Contacts
- Site map
- A-Z Index
- New developments
Procedures
 The user training video Graduate Attributes and Reports shows you where and how graduate attribute data is updated, and demonstrates creating and running custom reports.
Course Area Graduate Attributes (CAGAs)
- Log in to CIS
- Go to the course area (i.e. go to search, choose type='Course area')
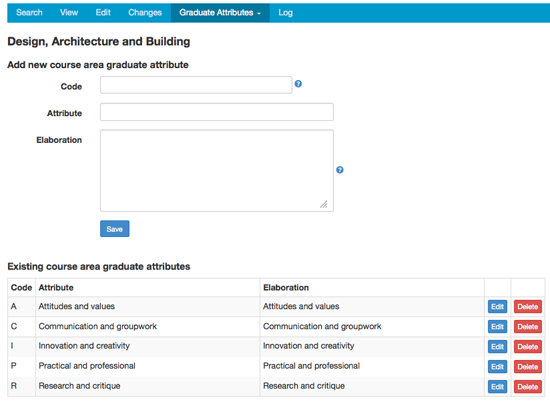
- Choose the Graduate Attributes tab. On this tab, new CAGAs can be added and any existing CAGAs are displayed and can be edited or deleted.
- To add a new CAGA, under the 'Add new course area graduate attribute' heading:
- at 'Code', insert a code. The code should be an whole number or a letter. Currently there is no system validation on codes but they should obviously be unique and in a sequence with no gaps. To assist students there is an informal agreement across the university that analytical and research CAGA are code 1; creativity and context CAGA are code 2; communication skills CAGA are code 3; attitudes and values CAGA are code 4; and practical and professional skills CAGA are code 5.
- at 'Attribute' insert the brief description for the CAGA
- at 'Elaboration' insert an expanded version of the CAGA
- Click the [Save] button.
- To edit an existing CAGA, under the 'Existing course area graduate attributes' heading, click the [Edit] button beside the CAGA you want to edit. Make the required changes and click the [Save] button or click the [Cancel] button to return to the list without saving any changes
- To delete an existing CAGA, under the 'Existing course area graduate attributes' heading, click the [Delete] button beside the CAGA you want to delete. You'll get a warning message. Click the [Yes, delete] button to continue, or the [No, cancel] button to stop. (Warning: deleting graduate attributes currently in use is not advisable and it cannot be undone.)
Course Graduate Attributes (CGAs): Courses
Edit
Inherit
Copy
Intended learning outcomes (CILOs)
Contributing study packages
Report settings/Reports
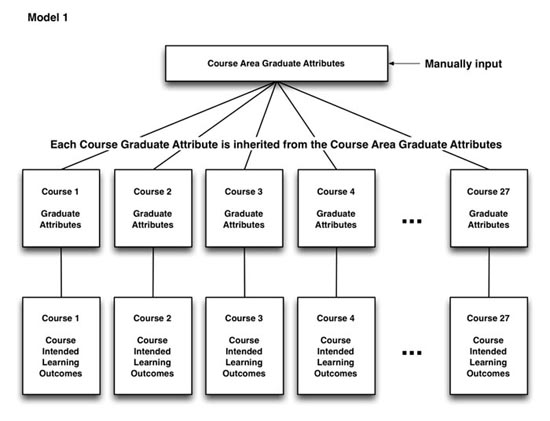
Every course has its own graduate attributes. These can be common across the faculty (see Model 1 below), shared between groups of courses, or attached to a single course (see Model 2 below).
- Log in to CIS
- Go to the course (i.e. go to search, choose type='Course' and insert the course code)
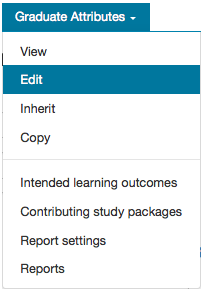
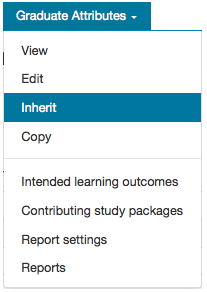
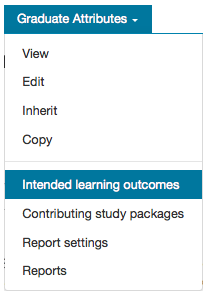
- Choose the Graduate Attributes tab. There are three CGA options on the drop-down:
Edit
Use to add or amend Course Graduate Attributes (CGAs) (either for an individual course or for the first course in a group of courses) (see Model 2 above).
- Go to Graduate Attributes / Edit
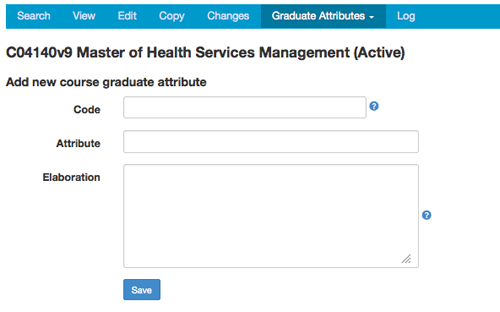
- To add a new CGA, under the 'Add new course graduate attribute' heading:
- at 'Code', insert a code. The code should be an whole number or a letter
- at 'Attribute' insert the short description for the CGA; this will appear in drop-down lists
- at 'Elaboration' insert the full description for the CGA
- Click the [Save] button.
- To edit an existing CGA, under the 'Existing course graduate attributes' heading, click the [Edit] button beside the CGA you want to edit. Make the required changes and click the [Save] button or click the [Cancel] button to return to the list without saving any changes:
- To delete an existing CGA, under the 'Existing course graduate attributes' heading, click the [Delete] button beside the CGA you want to delete. You'll get a warning message. Click the [Yes, delete] button to continue, or the [No, cancel] button to stop. (Warning: deleting graduate attributes currently in use is not advisable and it cannot be undone.)
Inherit
When there is a common set of Course Area Graduate Attributes (CAGAs) for all courses, these are entered in the Course Area section of CIS and then added to each course using the 'Inherit' option (see Model 1 above).
- Go to Graduate Attributes / Inherit
- The graduate attributes (if any) from the course area that the course belongs to will be displayed:
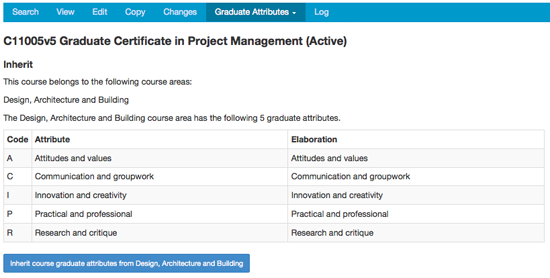
- Click the [Inherit course graduate attributes from [course area]] button to add them to the course.
Note: At present there is no ongoing synchronisation of CGAs with CAGAs, so any changes to a CAGA will not automatically flow through to the CGA. Faculties need to keep their own records of which courses need to have matching CAGAs and CGAs.
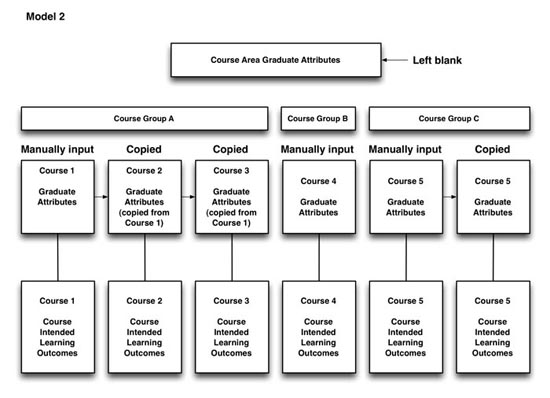
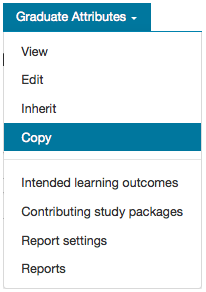
Copy
Note: This function has been replaced by an enhancement to the copy function on the Copy tab, where you can now select the graduate attributes you want to copy.
When groups of courses in a faculty share the same Course Graduate Attributes (CGAs), the CGAs need to be added to the first course in the group (using the 'Edit' option). Then from within each of the other courses in the group, the CGAs need to be copied from the first course using the 'Copy' option (in this instance the Course Area Graduate Attributes (CAGAs) are left blank) (see Model 2 above):
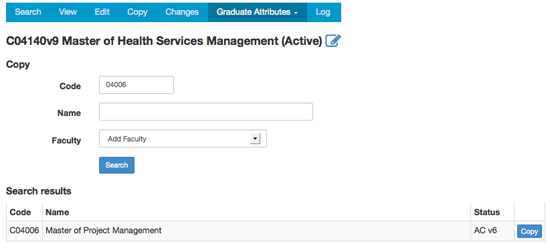
- Go to Graduate Attributes / Copy
- Search for the course to copy from (i.e. the first course in the group where the CGAs have been added) by inserting the 'Code', 'Name' or 'Faculty' and click the [Search] button
- On the 'Search results' list, click the [Copy] button beside the course you want to copy the CGAs from:
- You'll then be presented with a confirmation screen where you can view the CGAs and CILOs of the course you're copying from. You can choose to copy the course's CILOs at the same time as you copy the CGAs by ticking the check box above the list of CILOs.

To confirm the copy, click the [Copy] button. All existing CGAs and, if ticked, the CILOs will be replaced. This cannot be undone.
Note: At present there is no ongoing synchronisation of CGAs with CAGAs, so any changes to a CAGA will not automatically flow through to the CGA. Faculties need to keep their own records of which courses need to have matching CGAs.
Intended learning outcomes (CILOs): Courses
Once the Course Graduate Attributes (CGAs) have been set up (by manual entry, inheriting or copying) the Course Intended Learning Outcomes (CILOs) need to be entered.
- Log in to CIS
- Go to the course (i.e. go to search, choose type='Course' and insert the course code)
- Choose the Graduate Attributes tab, and click 'Intended learning outcomes'.
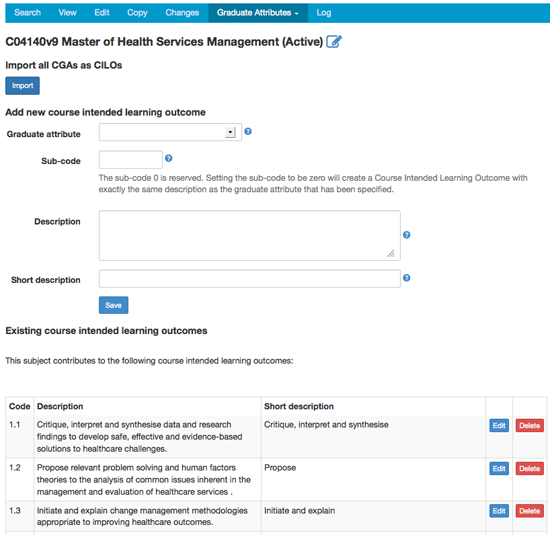
On this screen, new CILOs can manually added, added by importing them from the CGAs, and any existing CILOs are displayed and can be edited or deleted. - To import all the course's CGAs as new CILOs, click the [Import] button under the 'Import all CGAs as CILOs' heading; all existing CGAs are imported and become CILOs with a sub-code of '0', so CGA 1 would become CILO 1.0, CGA 2 would become CILO 2.0, etc. Any existing CILOs are not overwritten unless they have a sub-code of '0'.
- To import a single CGA as a new CILO, under the 'Add new course intended learning outcome' heading:
- at 'Graduate attribute' choose a graduate attribute from the drop-down list
- at 'Sub-code', insert '0'
- at 'Description' leave blank
- at 'Short description' leave blank
- Click the [Save] button. The CGA will be imported and become a CILO with the same 'Description' and 'Short description' data.
- To add a new CILO, under the 'Add new course intended learning outcome' heading:
- at 'Graduate attribute' choose a graduate attribute from the drop-down list to link the CILO to
- at 'Sub-code', insert a code. The sub-code should be an whole number or a letter. The complete code of the CILO is the code of the Graduate Attribute followed by a point followed by the sub-code (e.g.if the Graduate Attribute is '1' and the CILO sub-code is '2', then the automated CILO code is '1.2'). Currently there is no system validation on codes but they should obviously be unique and in a sequence with no gaps. There is no limit to the number of CILOs that can be linked to a Graduate Attribute.
- at 'Description' insert the full intended learning outcome
- at 'Short description' insert a shortened form of the intended learning outcome (the short description appears in a drop-down list with the CILO code when a link is being set up in a subject assessment task between an assessment criteria and a CILO)
- Click the [Save] button.
- To edit an existing CILO, under the 'Existing course intended learning outcomes' heading, click the [Edit] button beside the CILO you want to edit. Make the required changes and click the [Save] button or click the [Cancel] button to return to the list without saving any changes.
- To delete an existing CILO, under the 'Existing course intended learning outcomes' heading, click the [Delete] button beside the CILO you want to delete. You'll get a warning message. Click the [Yes, delete] button to continue, or the [No, cancel] button to stop. (Warning: deleting CILOs currently in use is not advisable and it cannot be undone.)
Lead-in sentence
The CILO lead-in sentence is edited via CI / Course Area / 'CILO lead-in sentence' field. The lead-in sentence (if populated) is common across all subject outline PDFs within the course area, e.g. 'This subject also contributes to the development of the following course intended learning outcomes:'.
Subject Outline PDF
For CILO data to automatically appear in the Subject Outline PDF, the following is required:
- one or more CILOs must be linked in one or more of the subject's assessment tasks criteria linkages tables (edited via SO / Assessment Tasks / Criteria linkages), and
- the 'CILO lead-in sentence' field must NOT be blank (edited via CI / Course Area).
If both requirements are met, the CILOs are displayed under the 'Subject objectives' heading, after the list of SLOs. They are introduced by the 'CILO lead-in sentence' and then appear under this sentence as a bulleted list. The CILO code (e.g. '1.3') appears in brackets after the CILO description.
Contributing study packages: Courses
- Log in to CIS
- Go to the course (i.e. go to search, choose type='Course' and insert the course code)
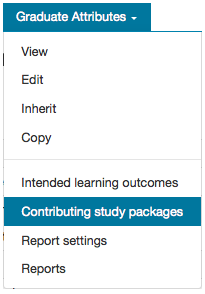
- Choose the Graduate Attributes tab, and click 'Contributing study packages'.
On this screen, all subjects or majors that have the course assigned as the parent course are listed. To remove a subject or major from this list, go to the subject (in CIS / Subject / Graduate Attributes / Parent study package) or major (CIS / Major / Graduate Attributes / Parent course) and amend or add the parent course/study package.
Course Graduate Attributes (CGAs): Majors
Parent course
Course intended learning outcomes (CILOs)
Contributing subjects
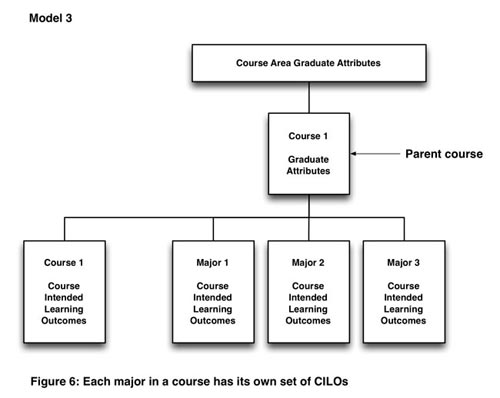
In some faculties a single course has multiple majors covering different sub-disciplines. When this is the case the intended learning outcomes of the course may depend on which major is undertaken (see Model 3 below). As such, you can specify CILOs for a major by defining the parent course and then linking the major's CILOs to the parent course's graduate attributes (CGAs). Only one parent course can be specified.
Parent course: Majors
- Log in to CIS
- Go to the major (i.e. go to search, choose type='Major' and insert the major code)
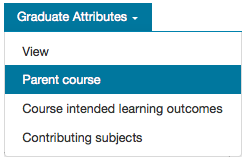
- Choose the Graduate Attributes tab, and click 'Parent course'.
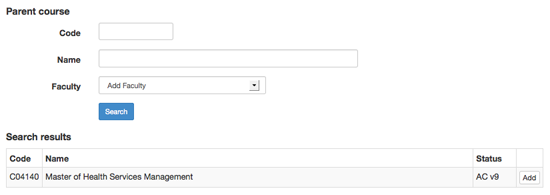
- Search for the course to add as the parent course by inserting the 'Code', 'Name' or 'Faculty' and click the [Search] button
- On the 'Search results' list, click the [Add] button beside the course you want to add as the parent course.
Course intended learning outcomes (CILOs): Majors
Once the parent course has been assigned, you can then add the CILOs, drawing the course graduate attributes (CGAs) from the assigned parent course.
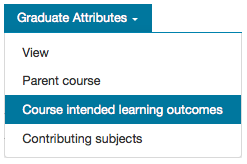
Choose the Graduate Attributes tab, and click 'Course intended learning outcomes'.
To add a new CILO, under the 'Add new course intended learning outcome' heading:
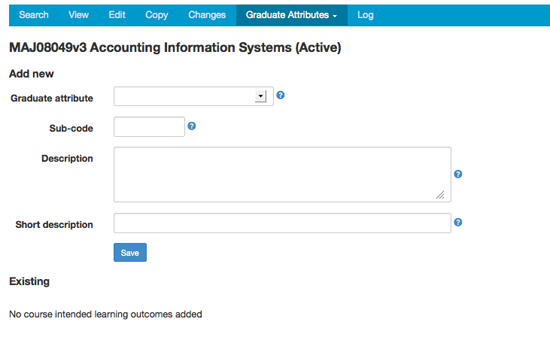
- at 'Graduate attribute' choose a graduate attribute (from the assigned parent course) from the drop-down list to link the CILO to
- at 'Sub-code', insert a code. The sub-code should be an whole number or a letter. The complete code of the CILO is the code of the Graduate Attribute followed by a point followed by the sub-code (e.g.if the Graduate Attribute is '1' and the CILO sub-code is '2', then the automated CILO code is '1.2'). Currently there is no system validation on codes but they should obviously be unique and in a sequence with no gaps. There is no limit to the number of CILOs that can be linked to a Graduate Attribute.
- at 'Description' insert the full intended learning outcome
- at 'Short description' insert a shortened form of the intended learning outcome (the short description appears in a drop-down list with the CILO code when a link is being set up in a subject assessment task between an assessment criteria and a CILO)
- Click the [Save] button.
To edit an existing CILO, under the 'Existing course intended learning outcomes' heading, click the [Edit] button beside the CILO you want to edit. Make the required changes and click the [Save] button or click the [Cancel] button to return to the list without saving any changes.
To delete an existing CILO, under the 'Existing course intended learning outcomes' heading, click the [Delete] button beside the CILO you want to delete. You'll get a warning message. Click the [Yes, delete] button to continue, or the [No, cancel] button to stop. (Warning: deleting CILOs currently in use is not advisable and it cannot be undone.)
Contributing subjects: Majors
- Log in to CIS
- Go to the major (i.e. go to search, choose type='Major' and insert the major code)
- Choose the Graduate Attributes tab, and click 'Contributing subjects'.
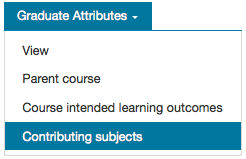
On this screen, all subjects that have the major assigned as the parent study package are listed. To remove a subject from this list, go to the subject (in CIS / Subject / Graduate Attributes / Parent study package) and amend its parent study package.
Subject Learning Objectives (SLOs)
Parent study package
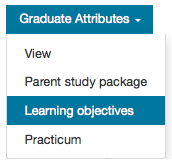
Learning objectives
Practicum
SLOs and Parent SPK reports
To enable the linking of Subject Learning Objectives (SLOs) with Course Intended Learning Outcomes (CILOs), a parent study package needs to be specified via the 'Parent study package' option on the Graduate Attributes tab and the SLOs need to be entered into CIS Subjects via the 'Learning objectives' option on the Graduate Attributes tab.
You can set up the subject's SLOs (at CIS / Subject / Graduate Attributes / Learning objectives) before you have specified the subject's parent study package (at CIS / Subject / Graduate Attributes / Parent study package). You can also set up the subject's assessment criteria (at SO / Assessment Tasks / Edit # / Criteria linkages) and link them to the SLOs before you have specified a parent study package. However, until you have set up the parent study package (at CIS / Subject / Graduate Attributes / Parent study package) you cannot link the assessment criteria to CILOs.
Therefore, both the parent study package and the SLOs should be set up before populating the assessment linkages table. Logically, it would also make sense to be very clear about what the course as a whole was trying to achieve (i.e. the CILOs) before setting up the SLOs.
Parent study package
The parent study package is the course (or major) whose Course Intended Learning Outcomes (CILOs) are linked to in the subject's assessment criteria in the 'Criteria linkages' table (at Assessment Tasks / Edit #). The parent study package needs to be assigned before the 'Criteria linkages' can be fully completed.
- Log in to CIS
- Go to the subject
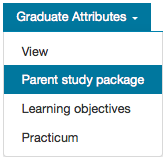
- Choose the Graduate Attributes tab, and click 'Parent study package'.
You'll be taken to the parent study package screen.
If a parent study package has not already been assigned, you can search for it. Choose a type and add the code, name or faculty and click the [Search] button:
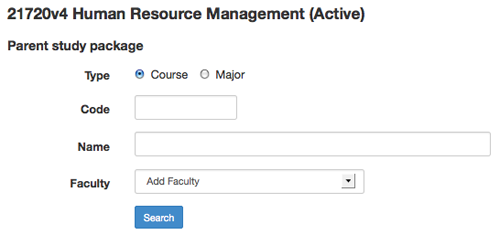
In the search results, click the [Add] button beside the study package you want to assign to the subject.

If a parent study package has already been assigned, it will be displayed when you go to the parent study package screen. You can delete this parent study package and add a new one by clicking the [Delete] button beside the assigned study package and then searching for a new parent study package to assign:

Learning objectives
- Log in to CIS
- Go to the subject
- Choose the Graduate Attributes tab, and click 'Learning objectives'
You'll be taken to the subject learning objectives (SLOs) screen. On this screen, new SLOs can be added and any existing SLOs are displayed and can be edited or deleted
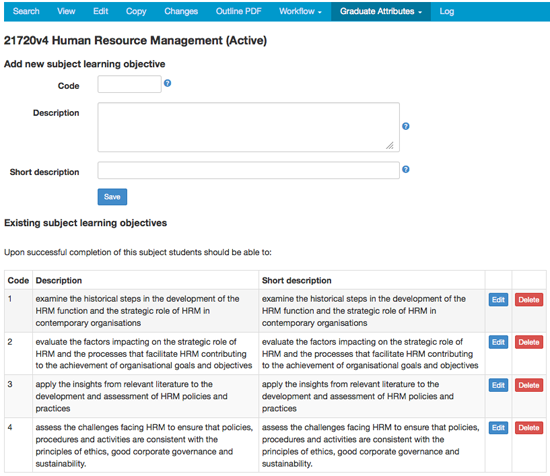
To add a new SLO, under the 'Add new subject learning objective' heading:
- at 'Code', insert a code. The code should be an whole number or a letter (upper or lower case). Currently there is no system validation on codes but they should obviously be unique and in a sequence with no gaps. There is no limit to the number of SLOs that can be entered.
- at 'Description' insert the full subject learning objective
- at 'Short description' insert a shortened form of the subject learning objective (the short description appears in a drop-down list with the SLO code when a link is being set up in a subject assessment task between an assessment criteria and a SLO)
- Click the [Save] button.
To edit an existing SLO, under the 'Existing subject learning objectives' heading, click the [Edit] button beside the SLO you want to edit. Make the required changes and click the [Save] button or click the [Cancel] button to return to the list without saving any changes.
To delete an existing SLO, under the 'Existing subject learning objectives' heading, click the [Delete] button beside the SLO you want to delete. You'll get a warning message. Click the [Yes, delete] button to continue, or the [No, cancel] button to stop. (Warning: deleting SLOs cannot be undone.)
Lead-in sentence
The SLO lead-in sentence is edited via CI / Course Area / 'SLO lead-in sentence' field. The lead-in sentence (if populated) is common across all subject outline PDFs within the course area, e.g. 'Upon successful completion of the subject, students should be able to:'.
Subject Outline PDF
SLO data is automatically displayed under the 'Subject objectives' heading in the Subject Outline PDF. If there is data stored in the 'SLO lead-in sentence' field, it is displayed above the list of SLOs. The SLOs are formatted as a numbered list, using the SLO code for the number and SLO description for the text.
Note: Unlike CILOs, the 'SLO lead-in sentence' field can be left blank and the SLOs are still displayed in the Subject Outline PDF.
Practicum
If the subject has some assessment tasks that must be completed satisfactorily to pass the subject, but which do not contribute to the student's mark, a number needs to be added to this field. In all other circumstances this field should be '0' or blank.
- Log in to CIS
- Go to the subject
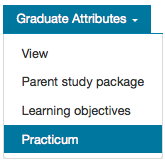
- Choose the Graduate Attributes tab, and click 'Practicum'
- Insert a number between '0' and '1'
- Click the [Save] button

The practicum factor is a number between '0' and '1'. This number is the extent to which achieving the subject's learning objectives relies on the tasks without marks compared to the tasks with marks.
For example, if students must complete a nursing practicum task to satisfactorily complete the subject, i.e. achieve the subject learning objectives (SLOs), but that practicum is a mark-free task, a practicum factor needs to be added.
If the mark-free task and the marked tasks contribute equally to achieving the SLOs, a practicum factor of '0.5' needs to be added.
If the marked tasks make no contribution to achieving the SLOs, and instead, the learning objectives are attained entirely through the student performing satisfactorily in the mark-free tasks, a practicum factor of '1' needs to be added.
SLOs and Parent SPK reports
To assist with data population of the new SLOs and parent study package data, APO:CIS can provide you with two reports:
- a download of all data currently stored in the 'Learning outcomes/objectives' field
- a download of all data currently stored for parent study package.
The reports are provided as excel spreadsheets and list all your subjects whether they have data or not. You can amend these spreadsheets and add data where there is none and APO:CIS can then import them back into CIS. Log an 'APO CIS' Service Desk request to get a report generated.
Changes in subject outlines
Changes have also been made to CIS Subject Outlines to accommodate the GA functionality. The changes are confined to the Assessment Tasks tab.