
- Access
- Fields
- Procedures
- Handbook Schedule
- Resources
- Contacts
- Site map
- A-Z Index
- New developments
Reports
 The user training video Graduate Attributes and Reports shows you where and how graduate attribute data is updated, and demonstrates creating and running custom reports.
System reports
APO: CIS can generate and provide, on request, four graduate attribute reports.
Report 1: GA report is an Excel spreadsheet with the following data:
- Subject code and version (Active subjects only)
- Subject name
- Parent spk
- Parent spk version
- Parent spk status
- SLO
- CILOs
- Each task's criteria linkages
Report 2: CILOs is an Excel spreadsheet with the following data:
- Course code and version
- Course name
- Course area
- CILOs: provided as a list within the one cell
Report 3: Criteria linkages is an Excel spreadsheet with the following data:
- Subject code and version (Active subjects only)
- Subject name
- For each assessment:
- number
- heading
- weighting
- criteria linkages table data (i.e. criteria, weight, SLO, CILO)
- subject coordinator details
Report 4: Criteria linkages warning message provides a list of subjects that have the CLT warning message (because the CILOs, SLOs or parent SPK has been changed and need re-linking). It includes the following data:
- Subject code, version and status (e.g. AC)
- Parent code, version number and status
- Assessment tasks affected, i.e. the tasks that have a warning message
Create your own report
– Report settings (setting up or editing an existing report)
– Reports (running a report and understanding what's displayed when you do)
Alternatively, you can use the graduate attributes reporting function to create your own reports. The reporting function enables users to customise, run and store reports on any set of subjects, and to see how their associated GAs and CILOs are represented across the subjects' assessment tasks.
Admin and other users with GA privileges are able to set up and edit reports; all users are able to run, view and download existing reports.
Graduate Attributes/Report settings
– Create a new report
– Edit or delete an existing report
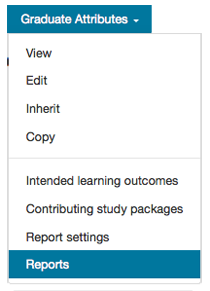
To create a new report and define its subject set, or to edit or delete an existing report, go to:
Go to CI/Course/[course code]/Graduate Attributes tab, choose 'Report settings'
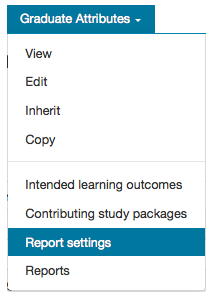
This will take you to a screen showing a list of existing reports, if any, and provide the option to create a new report.
Create a new report
– Step 1: Information
– Step 2: Parent course
– Step 3: Subjects to be included
– Step 4: Matching CILOs
Go to CI/Course/[course code]/Graduate Attributes tab, choose 'Report settings'
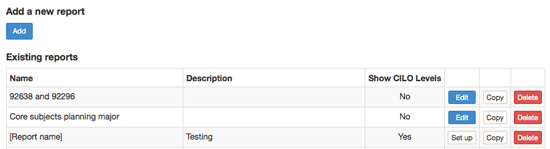
To create a new report, i.e. a new subject set to report on, click the [Add] button under 'Add a new report'.
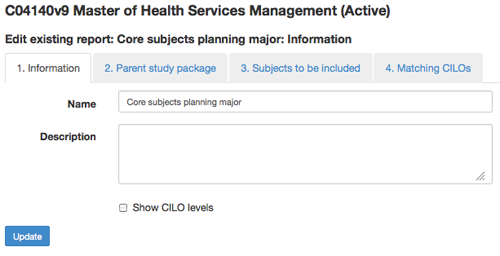
Edit or delete an existing reportStep 1: Information
At Step 1, specify the name of the new report and provide a short description of its content. The report name and description appear in the list of existing reports.
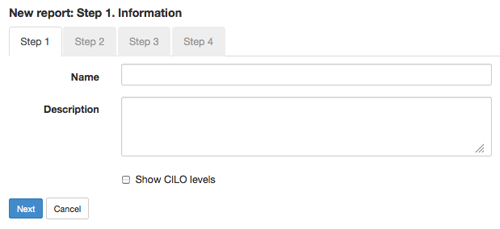
If the CILO levels have been specified in a subject's criteria linkages table, this data can be included in the report by ticking on the 'Show CILO levels' checkbox. This is not a required field.
When finished, click [Next] to go to Step 2.
Step 2: Parent course
At Step 2, search for and [Add] the parent course.
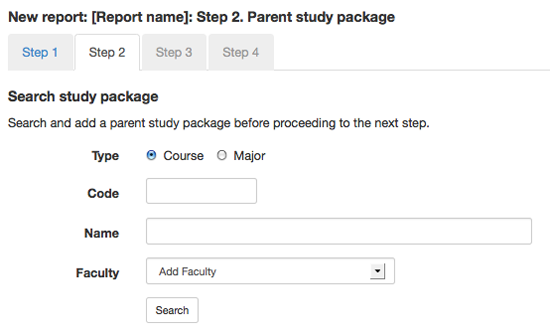
The parent course will be used to define the CILOs that will be reported against. This will normally be the course from within which the report is being generated.
For a combined degree there will normally be two reports, each reporting against the CILOs of the related single discipline degree (a combined degree will not normally have any CILOs of its own, and no subject will reference a combined degree as its parent or source of CILOs).

Once a course has been added, click [Next] to go to Step 3.
Step 3: Subjects to be included
At Step 3, the subjects that have the nominated course as their parent course (from Step 2) are automatically listed.
A tick in the 'Include' column means that the subject will be included in the report. Tick it off if the subject isn't required.

Search for and add additional subjects, as required, by searching for the subject and clicking the [Add] button. Note: You can only add subjects that you have access to which means you can only add subjects from within your assigned faculty. Contact APO: CIS to add any subjects you don't have access to add to your report.

Once all subjects have been added, click [Next] to go to Step 4.
Step 4: Matching CILOs
The final step in the process is to match the CILOs being reported on in the parent course and the CILOs that were defined for the parent course of any additional subjects added at Step 3.
Note: if no additional subjects were added at Step 3, you can skip this step by just clicking the [Finish] button.
In the matching table at Step 4, column 1 shows the subject's parent course CILOs. Column 2 provides dropdown lists of the CILOs of the report's parent course, defined at Step 2. Match the subject's parent course CILOs to the report's parent course CILOs. The nearest equivalent should be chosen. If there is no equivalent it should be left blank. Where more than one additional subject has the same parent, CILO matching is only required on the first subject.
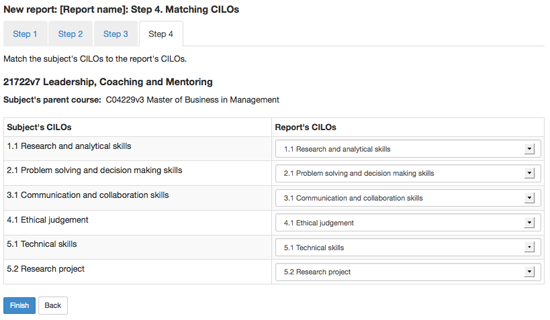
Click the [Finish] button when completed. The report will run automatically. Full details explaining the result when you run a report, are under Report display.
Edit or delete an existing report
Go to CI/Course/[course code]/Graduate Attributes tab, choose 'Report settings'
Edit or delete an existing report by clicking either the [Edit] or [Delete] button on the list of 'Existing reports'.

If instead of [Edit], the button says [Set up], it means that the report isn't yet fully set up. Note: the report will not appear on the existing reports list on the Graduates Attributes tab, 'Reports', until the set up is finalised.
Editing an existing report follows the same steps as setting up a new report, but because the report is already set up, the navigation between steps is slightly different, e.g. instead of [Step 1], the button says [1. Information], instead of [Step 2] the button says [2. Parent course].
Additionally, there are no [Next] buttons (as the report is already set up), but rather [Update] buttons. Click the [Update] button to save any changes you make.
Graduate Attributes/Reports
– Run a report
– Report display
– Troubleshooting
Run a report
After you have created a new report, it will automatically run. To run an existing or newly created report, go to:
CI/Course/[course code]/Graduate Attributes tab, choose 'Reports'
This will take you to a list of existing reports.
Click the required 'Run Report' button beside the name of the report you want to run:
- [Approved data] button: Run the report with data saved by the [Save] button in Subject Outlines/Assessment Tasks/Criteria linkages
- [Draft data] button: Run the report with data saved by the [Hold without update] button in Subject Outlines/Assessment Tasks/Criteria linkages

Report display
Once a report is run, the report data is displayed via six tabs:

1. List: lists all reports created for the course
2. Settings: shows the settings selected for the individual report across four tabs. This is for information only. Any changes to the settings need to occur via 'Report settings'.
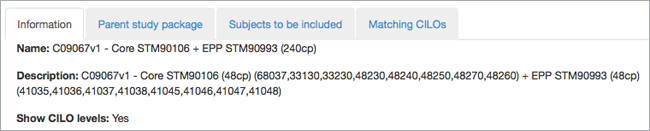
The next four tabs display the report results. In all displays, percentages reported are across the total marks entered for the subjects in SO/Subject/[code]/Assessment Tasks/Criteria linkages.
3. CILOs: piechart display of the percentage of marks allocated to assessment tasks targeting each CILO

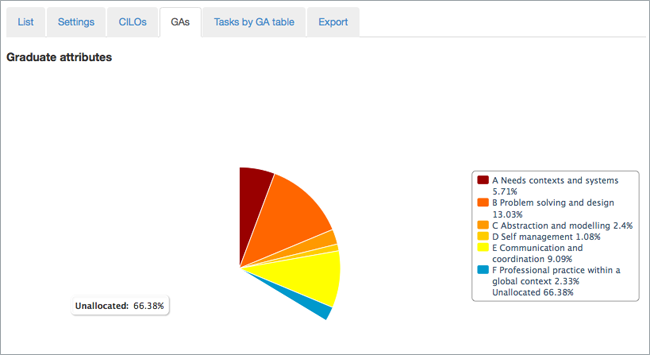
4. GAs: piechart display of the percentage of marks allocated to assessment tasks targeting each GA (GAs are not specified in SO; their proportionate weights are derived from their nested CILOs)
5. Tasks by GA table: a table showing in which subjects and assessment tasks each GA and its corresponding CILOs are addressed, and the percentage contributions. Levels are also displayed, where they have been specified. The table is downloadable as an Excel spreadsheet via the Export tab

6. Export: GA data can be exported into two Excel spreadsheets:
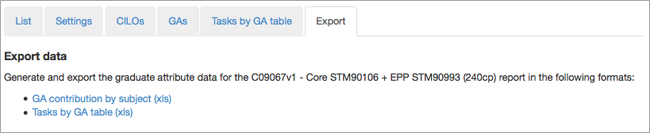
- GA contribution by subject: displays percentage breakdowns by subject for GAs and CILOs; levels are also displayed, where they have been specified
- Tasks by GA table: a spreadsheet of the table displayed on the 'Tasks by GA table tab'
Both spreadsheets include a 'Report settings' sheet, detailing the parent study package and the subjects included in the report.
Troubleshooting
The troubleshooting tips clarify how data needs to be entered and checked for optimum reporting.
- Should you experience duplication of columns in your report, or some other data anomaly, each subject's Criteria linkages table should be checked (via SO/Assessment tasks) to ensure it is sufficiently populated, and that no warning message is displaying above the table, i.e.:

- If marks are displaying as 'unallocated' in reports, and you do not wish this to occur, ensure the 'Treat the SLO and CILO columns as independent lists' checkbox (located above the CLT on the CLT edit screen) is ticked on. Otherwise the percentage of marks with no associated CILO are reported as 'unallocated'. See also further details and examples about the differences in reporting depending on the linkage mode used in the CLTs and whether the checkbox is ticked on or not.
- Apparent duplication of GA data across columns will occur where data has not been entered uniformly in CI, e.g. two CI entries for the same GA, possibly with spelling variation.
- If subjects are missing from a report, check to see if all assessment task weights in the missing subject are zero. If so, a practicum factor needs to be entered for the subject via Course Information.
- Any assessment task where the weight is blank (in 'Manage tasks'), will not appear in the report.
This warning message indicates that links need re-establishing due to CILO or SLO data changes. Once links are established, the warning message disappears, and the columns will no longer duplicate.